MEKICS MP1300
Note: No serial cable — this monitor is collected over TCP/IP via a dedicated Wi-Fi router. The router must be configured before first use, and the MP1300 must be rebooted for its network settings to apply.
| Cable | Adapter | Port | VR Device Name |
|---|---|---|---|
Ethernet — monitor → dedicated Wi-Fi router (192.168.0.1) → VR PC | — | TCP 6002 (monitor Server Port; Server IP = VR PC, see Device Configuration) | MEKICS |
Connection Requirements
The MP1300 speaks the MP601 central-station protocol; Vital Recorder listens as the central station on TCP port 6002. The example below uses an ipTIME mini3 router.
Connection Steps
Router Setup
- Power the router and connect the PC to its default AP,
iptime_mini(open network).
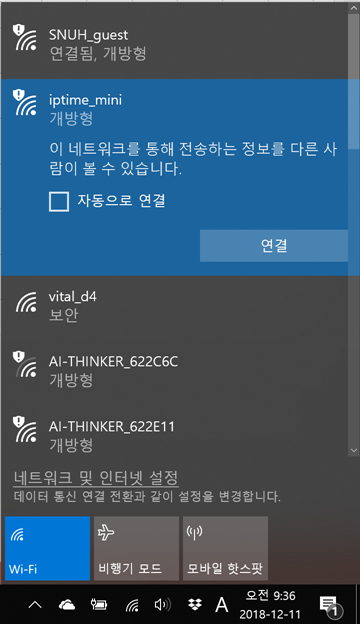
- Open a browser →
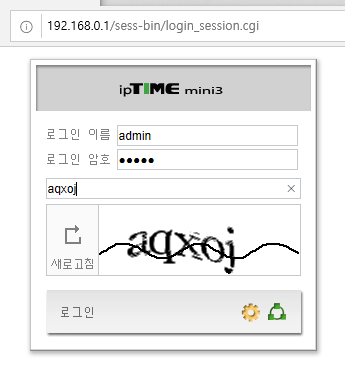
192.168.0.1→ log in withadmin/admin.
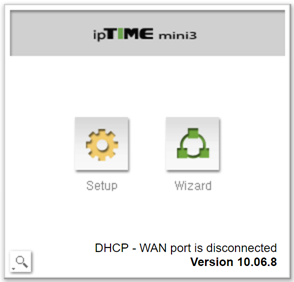
- Press Setup (not Wizard).
- Go to Advanced Settings → Wireless LAN Management → Wireless Settings/Security. Set the network name (SSID) and password, choose encryption WPA2PSK + AES, and uncheck "Broadcast SSID" → Apply.
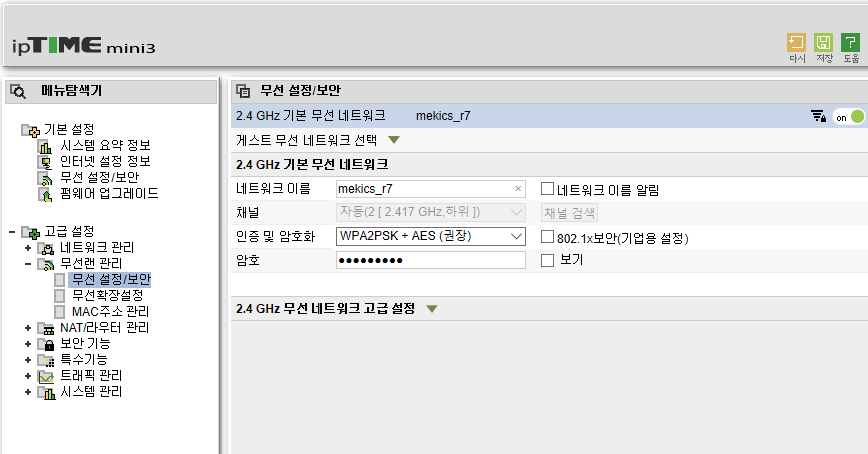
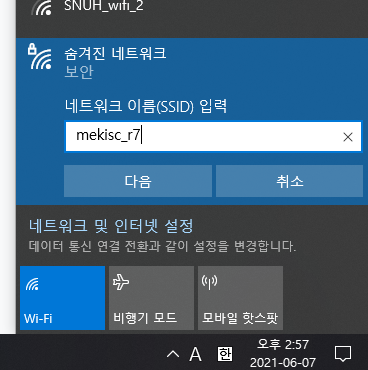
> Saving this drops the PC's connection because the SSID changed. Reconnect by adding a hidden network and typing the new SSID and password manually, then reopen 192.168.0.1.
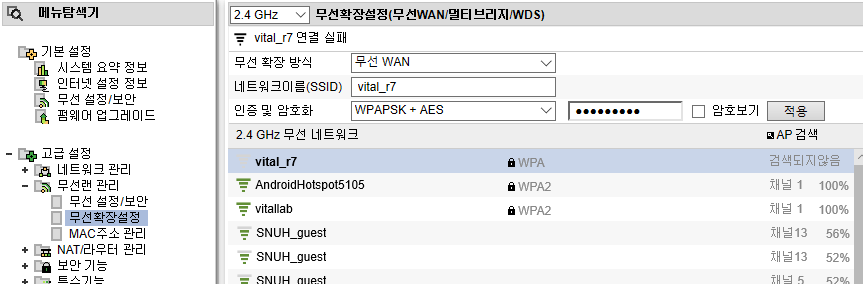
- (Optional — only if the router must reach an upstream network) Go to Advanced Settings → Wireless LAN Management → Wireless Extension Settings. Set the extension method to Wireless WAN and enter the SSID and password of the VR PC's hotspot.
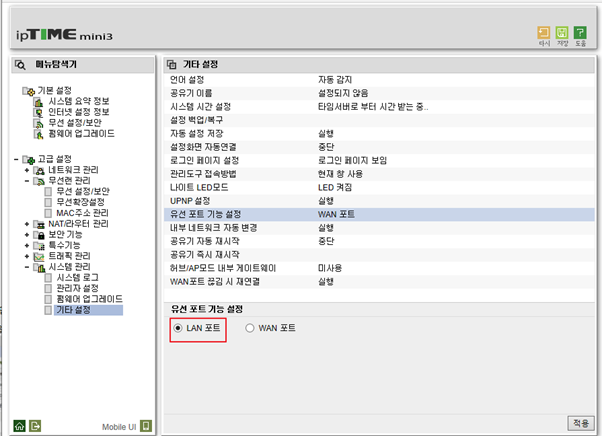
- Go to Advanced Settings → System Management → Other Settings. Under wired port function, select LAN Port → Apply.
Monitor Cabling
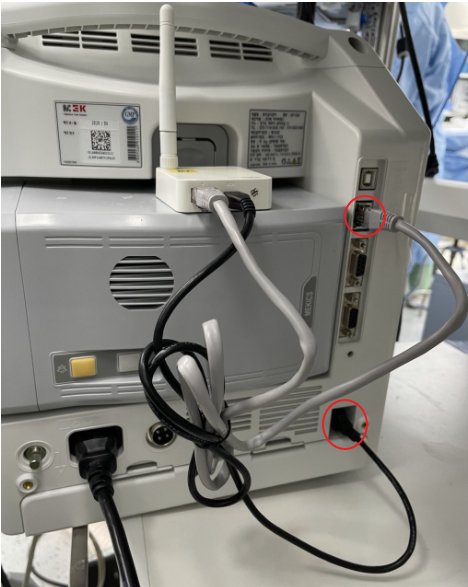
Mount the router on the monitor, power it from the USB port on the rear of the MP1300, and run a LAN cable from the router to the MP1300's Ethernet port.
Device Configuration
- On the monitor, go to System → Network and set the monitor's own address:
- IP:
192.168.0.xxx— the first three octets must match the router's subnet; the last octet is any unused value from 2–255, unique per monitor - Mask:
255.255.255.0 - Gateway:
192.168.0.1(the router)
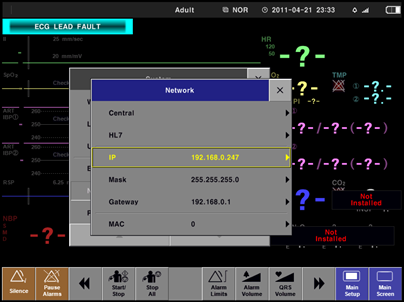
- Go to System → Network → Central → Mode and select MP601.
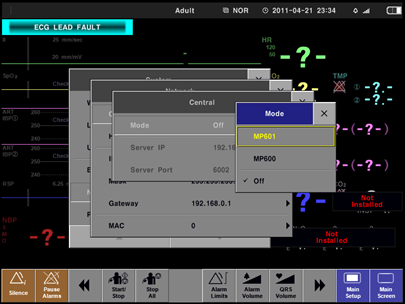
- Still under Central, set Server IP to the address of the Vital Recorder PC and Server Port to
6002.
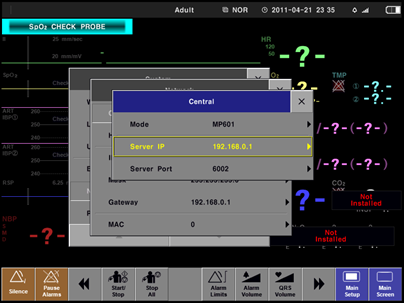
192.168.137.1is the Windows mobile-hotspot / ICS address, used when the router's wireless WAN uplinks to the VR PC's hotspot (Router Setup, step 5). If the VR PC is instead a wired or wireless client on the router's own LAN, use its192.168.0.xaddress.
- Restart the monitor — network changes only apply after a power cycle.
Vital Recorder Setup
In Vital Recorder press Add Device, select Patient monitor → MEKICS : MEKICS, and set Port to 6002.
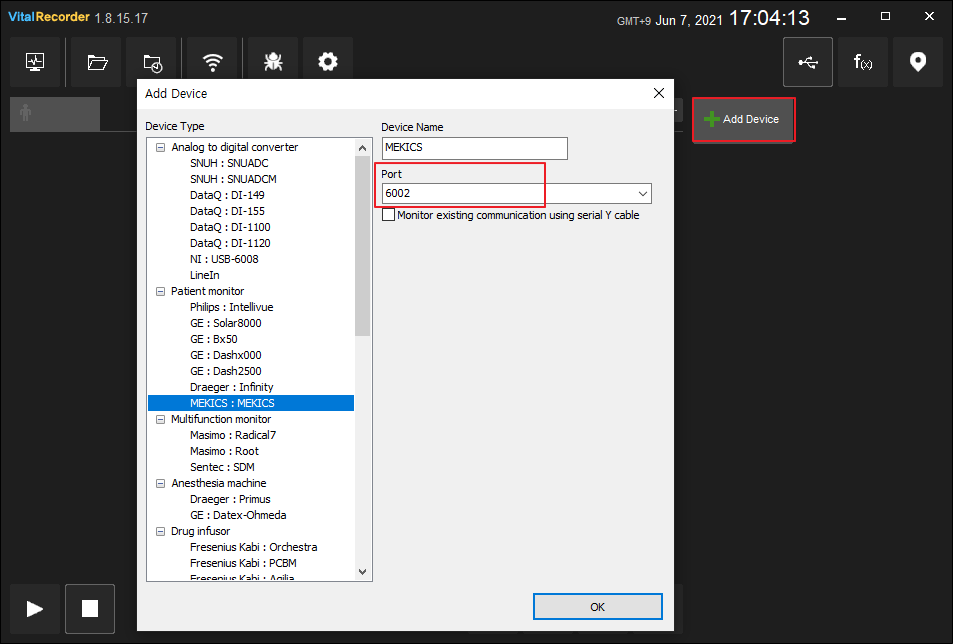
Troubleshooting
- The router does not appear in Wi-Fi scans. Expected — the SSID broadcast is disabled. Always reconnect as a hidden network.
- Vital Recorder shows the device but no values. Check that the
Portvalue in Vital Recorder and the monitor's Server Port match —6002is the default on both sides.
Notes
- One router can serve several MP1300s; give each monitor a distinct last octet and point them all at the same Server IP and port.