Philips IntelliVue MP / MX Series
Note: Use the port labeled
MIB/RS232, not the plainRS232port. Service-mode configuration is mandatory. The MIB port works whether or not the monitor is connected to a central station. MP2 and X2 monitors have no usable serial port and cannot be used.
| Cable | Adapter | Port | VR Device Name |
|---|---|---|---|
| Custom RJ-45 ↔ DB-9F | None | MIB/RS232 | Intellivue |
Cable Pinout
| DB-9F (PC side) | Signal | RJ-45 | Signal |
|---|---|---|---|
| 2 | RX | 5 | TX |
| 3 | TX | 7 | RX |
| 5 | GND | 4 | GND |
MP5 and MX400–550 monitors with an Advanced System Interface Board (ASIB) use a different pin assignment:
| DB-9F (PC side) | Signal | RJ-45 | Signal |
|---|---|---|---|
| 2 | RX | 7 | TX |
| 3 | TX | 5 | RX |
| 5 | GND | 4 | GND |
Connection Steps
- Locate the port labeled
MIB/RS232on the monitor. A separate port labeled onlyRS232(next toAlarm) is not the data-export port and will not work.
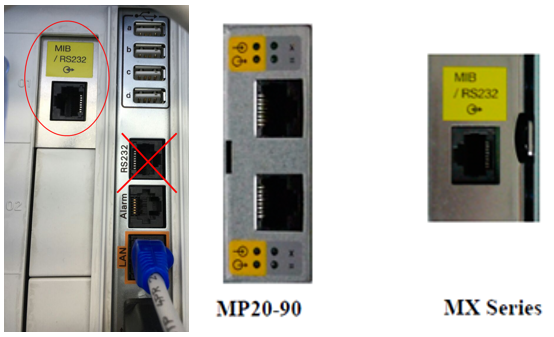
- Port placement and labeling differ by model — compare the unit against the variants below.
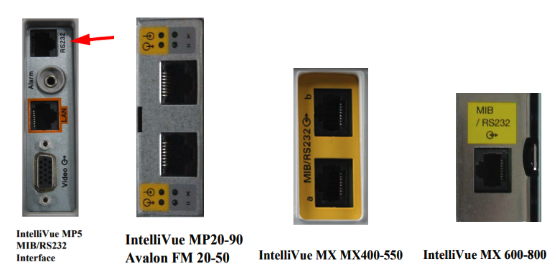
- Prepare a custom RJ-45 to DB-9F cable using the appropriate connections in Cable Pinout.
- Connect the RJ-45 end to the monitor's MIB port.
- Connect the DB-9F end to the PC's serial port. If the PC has no serial port, use a USB-Serial converter.
Device Configuration
- Press Main Setup → Operating Modes.
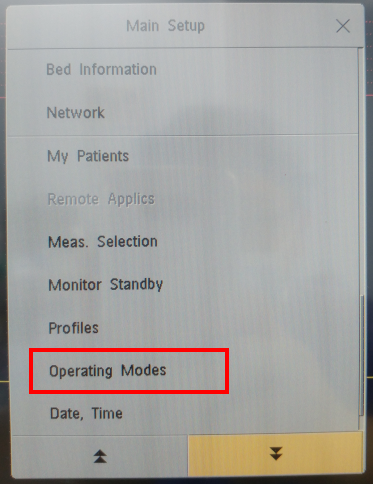
- Select Service and enter the service password (default:
1345).
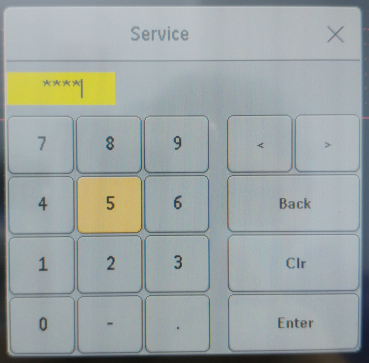
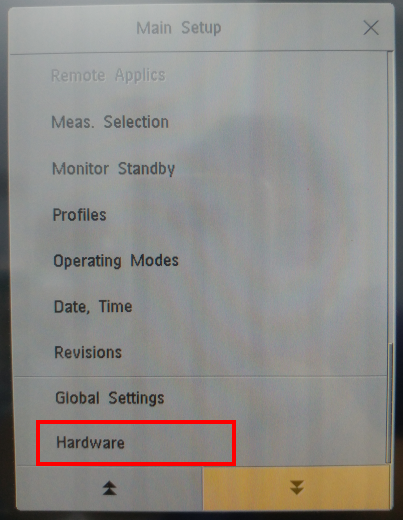
- Go back into Main Setup and scroll to the bottom of the list for Hardware.
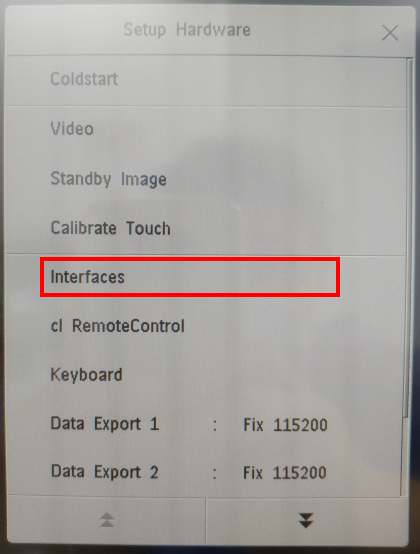
- In Setup Hardware, set Data Export 1 and Data Export 2 to
Fix 115200, then press Interfaces.
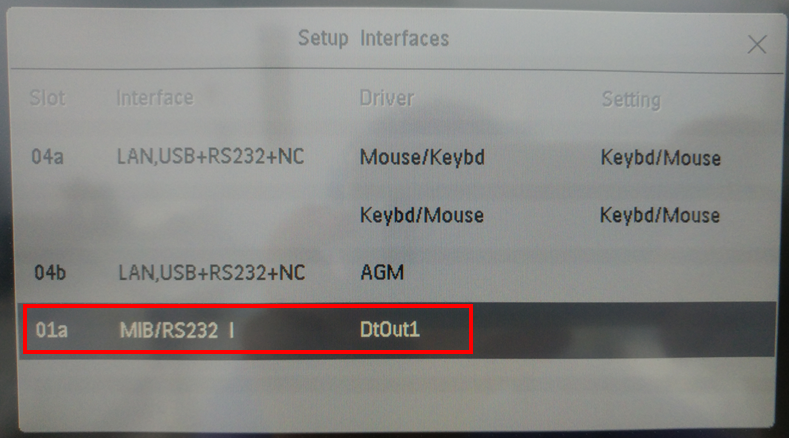
- In Setup Interfaces, verify the driver on the MIB/RS232 slot is
DtOut1. If it shows anything else (GM,AGM,Mouse/Keybd, …), press Change Driver → DtOut1.
- The digit after
DtOutfollows the slot the port is assigned to, soDtOut2may be correct on a monitor with a different card layout.
> When both data-export connections are in use, only one can receive waveforms at a time. The connection whose waveform request succeeds first receives the waveforms; waveform requests from the other connection are rejected.
- Reboot the monitor. The driver change only takes effect after a power cycle.
Optional: CO2 and Airway Pressure Waveforms via IntelliBridge EC10
Use this section when an anesthesia machine is connected to the IntelliVue monitor through an IntelliBridge EC10 module.
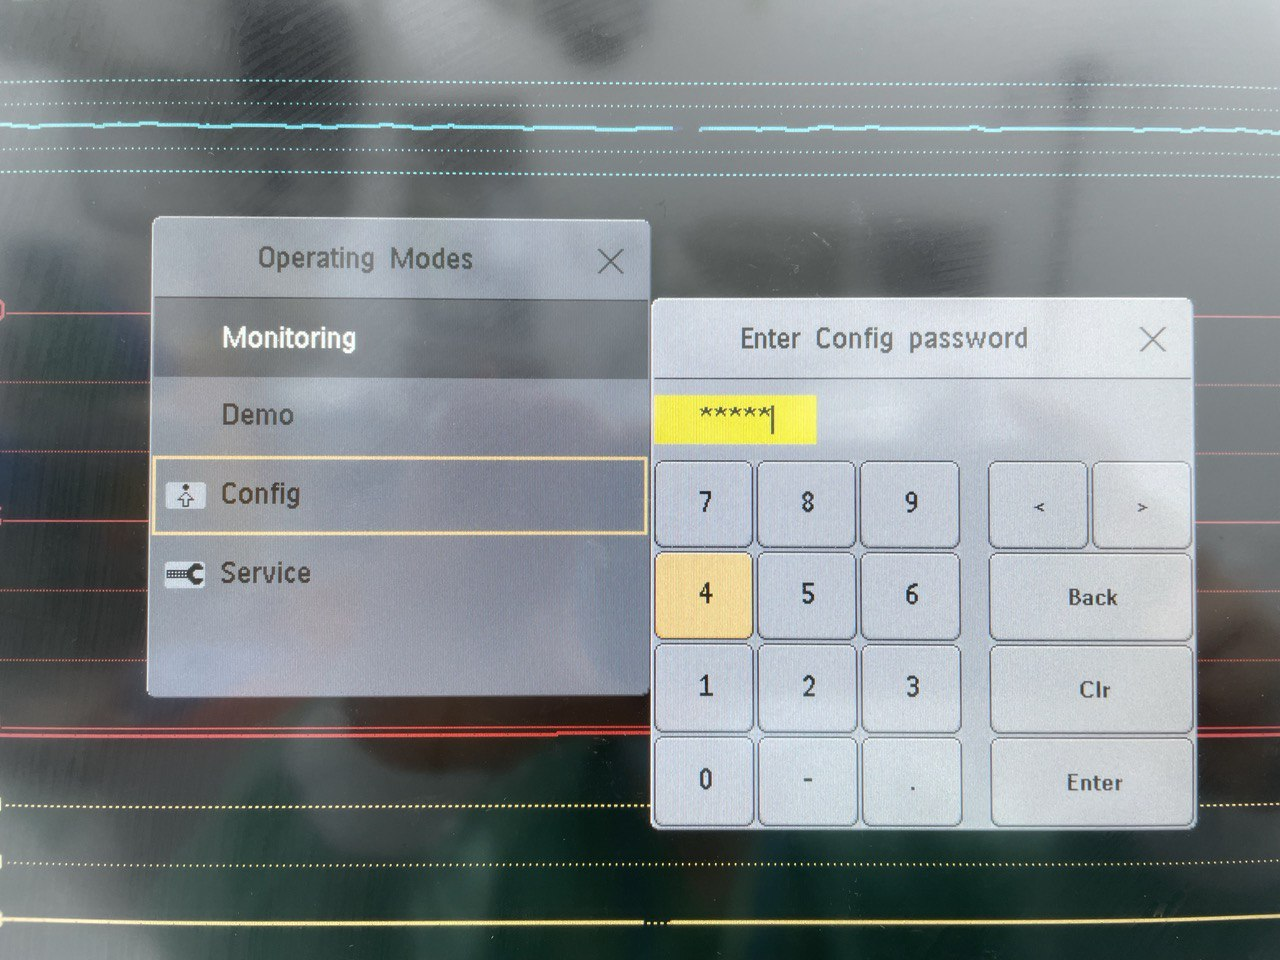
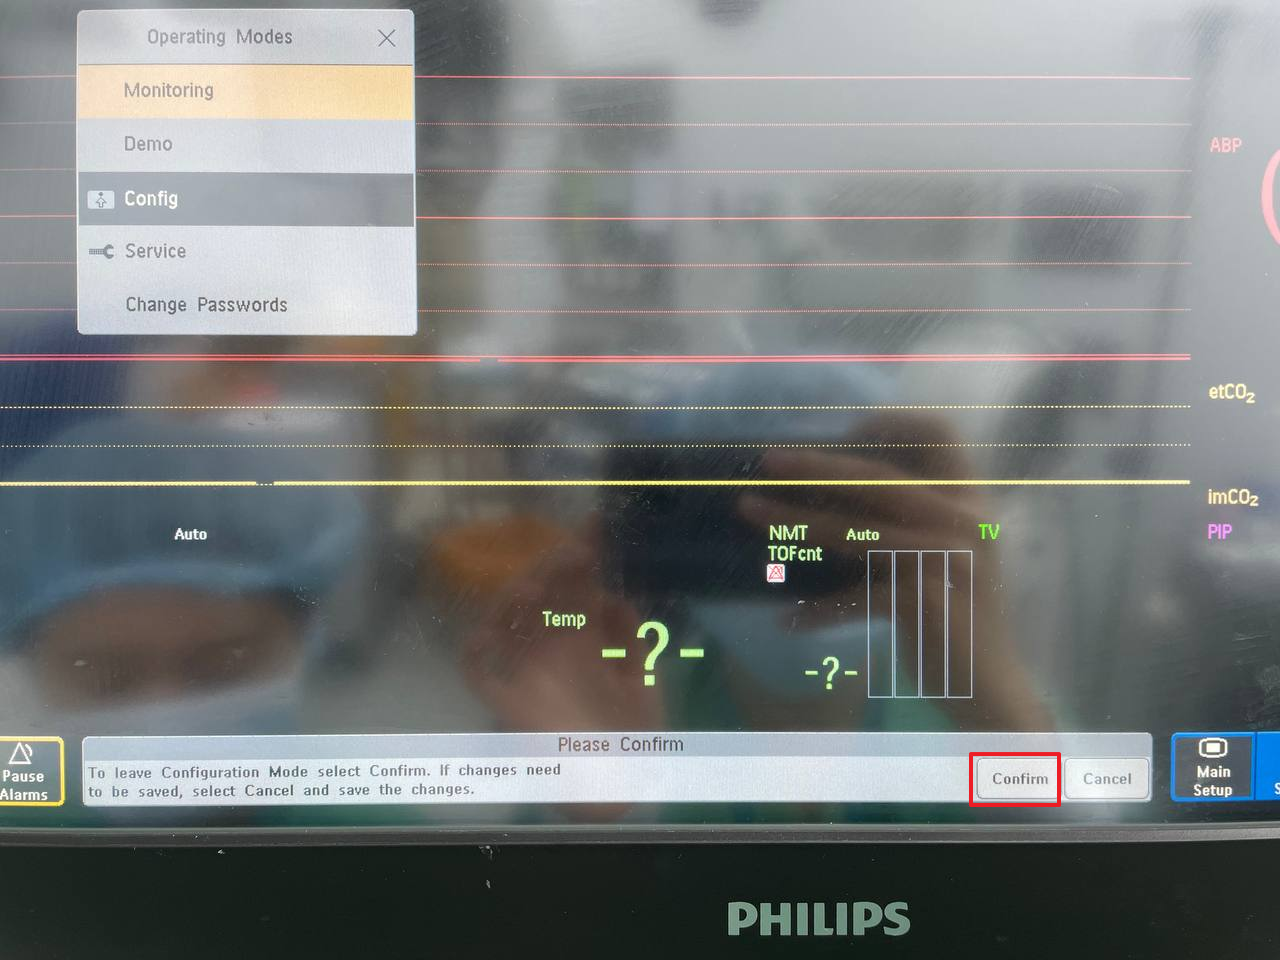
- Open Main Setup → Operating Modes → Config and enter the configuration password.
- Config password:
71034
- Press the Setup button on the IntelliBridge EC10 module.
- On the monitor, select Setup Device in the External Devices bar.
- Open Setup Anesth. Machine → Device Driver → Setup Waves.
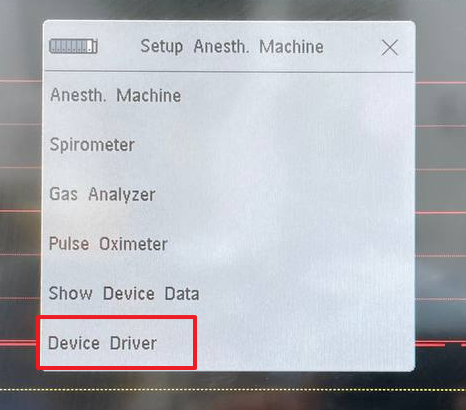
- Add CO2 and AWP, if available for the connected device.
- Press Confirm to leave configuration mode and apply the settings.
Vital Recorder Setup
- Add the device as
Intellivueand select the PC serial port used for the connection.
Troubleshooting
- A bed records nothing after a monitor swap or a power event. The
DtOut1setting can be lost silently. Re-check Setup Interfaces, then power-cycle the monitor and restart Vital Recorder. - Waveforms stop a few seconds after recording starts while numerics continue. More waveforms were requested than the serial link can carry, and the monitor then stops sending all of them. By default Vital Recorder adds a waveform for every numeric present on top of the ones selected. Clear the auto-add checkbox in the device dialog (
auto_wavs=0) so only the selected waveforms are requested. - Waves missing on old firmware (e.g. some MP20 units). Request them explicitly in
vr.conf. - Repeated crashes on a multi-bed installation, or serial reception failing. The multi-bed crash was fixed in 1.19.3; serial reception failure was fixed in 1.16.4.