Philips Intellivue MP / MX Series
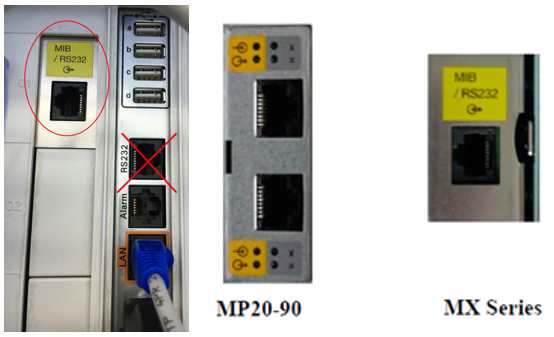
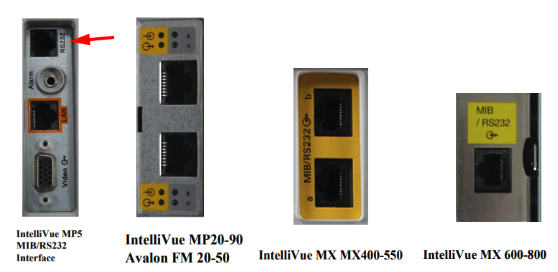
Note: Serial communication via the MIB port (RJ-45 style). Works regardless of connection to a central station.
| Cable | Adapter | Port | VR Device Name |
|---|---|---|---|
| Custom RJ-45 ↔ DB-9F | None | MIB port | Intellivue |
Connection Steps
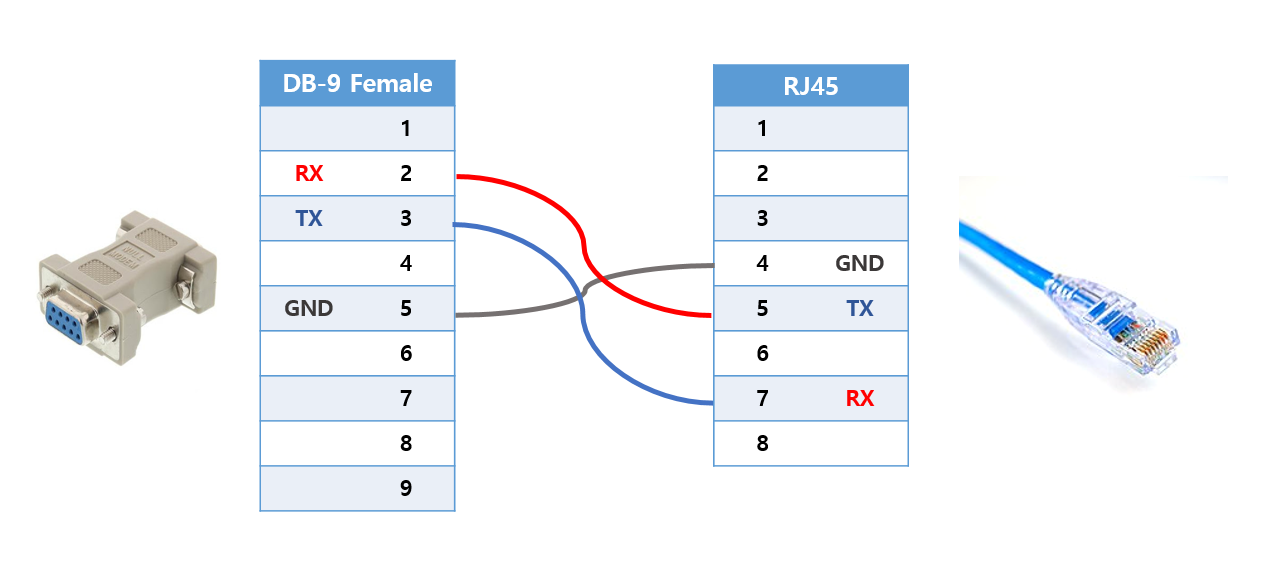
- Prepare a cable connecting RJ-45 pins 4, 5, 7 → DB-9F pins 5, 2, 3.
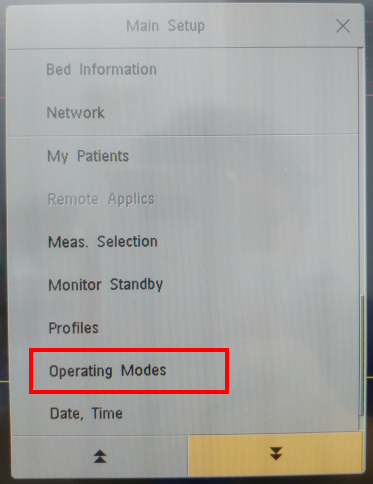
- Plug the RJ-45 end into the MIB port on the monitor.
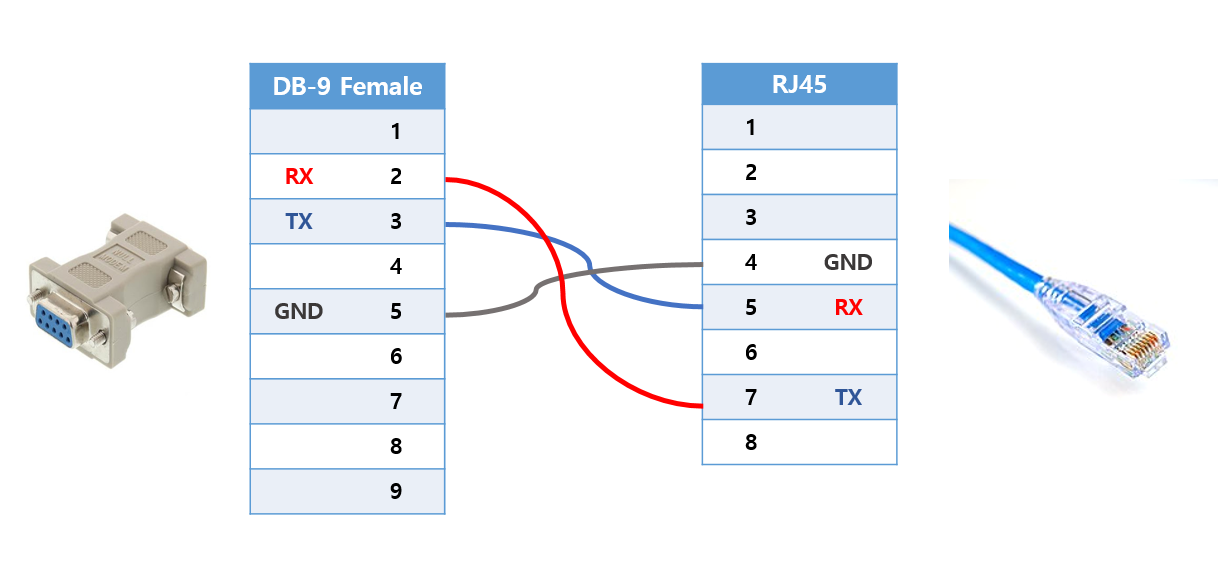
- Plug the DB-9F end into the PC via USB-Serial converter.
- MX400–550 series only: Use the Advanced Interface Card (Rx/Tx pins connect differently).
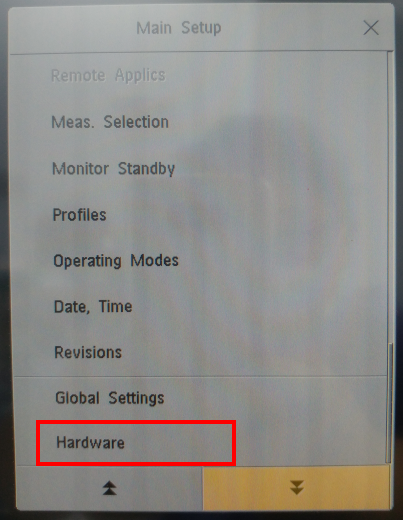
MX600–800 series: MIB board must be installed.
Device Configuration
- Press Main Setup → Operation Modes → Service.
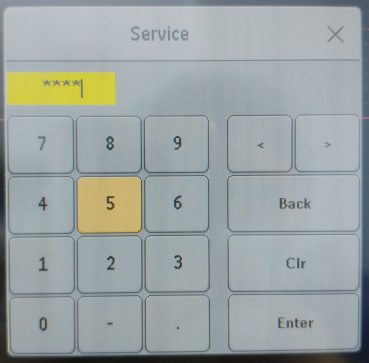
- Enter service password (default:
1345). Contact manufacturer if this fails.
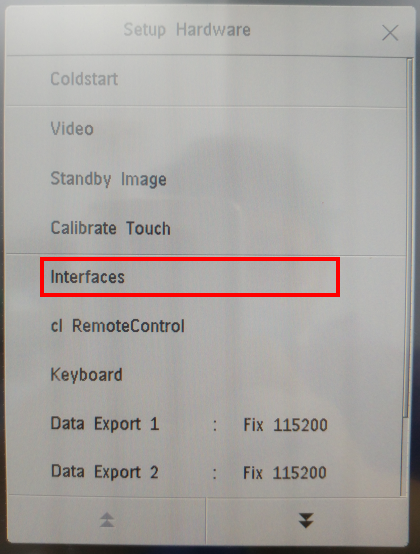
- Press Main Setup → Hardware (press and hold at bottom of menu).
- Set Data Export 1 and Data Export 2 baud rate to "Fix 115200".
- Press Interfaces.
- Verify port 01a driver is set to "DtOut1". If not, press Change Driver → DtOut1.
- Restart the monitor.
Optional — Extract ETCO2 Waveform (via IntelliBridge EC10 Module):
- Navigate to Main Setup → Operating Modes → Config.
- Config password: 71034
- Press the Setup button on the IntelliBridge EC10 module connected to the anesthesia machine.
- On the monitor, select Setup Device.
- Navigate to Setup Anesth. Machine → Device Driver → Setup Waves.
- Press Add and select CO2 and AWP.
- If incorrect waves appear, press Delete All, then re-add the correct waves.
- Select Select to change operating mode → monitoring.
- Press Confirm to apply the settings.
Note: MP2 and X2 monitors do not support serial communication and cannot be used with Vital Recorder.