GE Datex-Ohmeda Anesthesia Machine
Note: This guide describes the connection for Aisys CS2 and Avance CS2. Confirm the connector and pinout with GE for other models.
| Cable | Adapter | Port | VR Device Name |
|---|---|---|---|
| Custom 9-pin ↔ 15-pin serial | None | 15-pin female connector | Datex-Ohmeda |
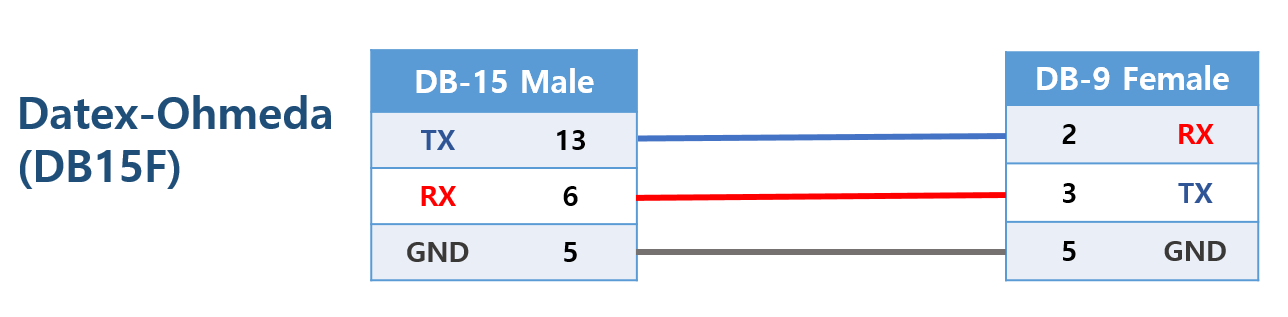
Cable Pinout
| Machine side — DB-15 male | PC side — DB-9 female |
|---|---|
| 13 — TX | 2 — RX |
| 6 — RX | 3 — TX |
| 5 — GND | 5 — GND |
Connection Steps
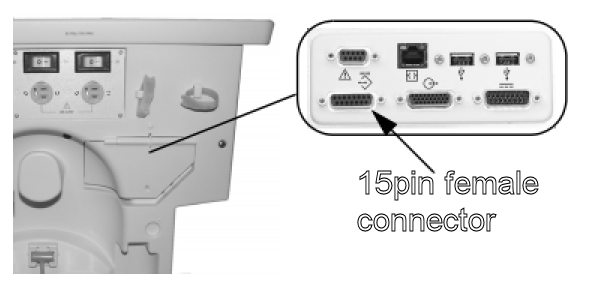
- Open the rear connector cover and connect the 15-pin end of the custom cable to the serial port.
- Connect the DB-9F end to the PC through a USB-Serial converter.
When the 15-pin Port Is Already in Use
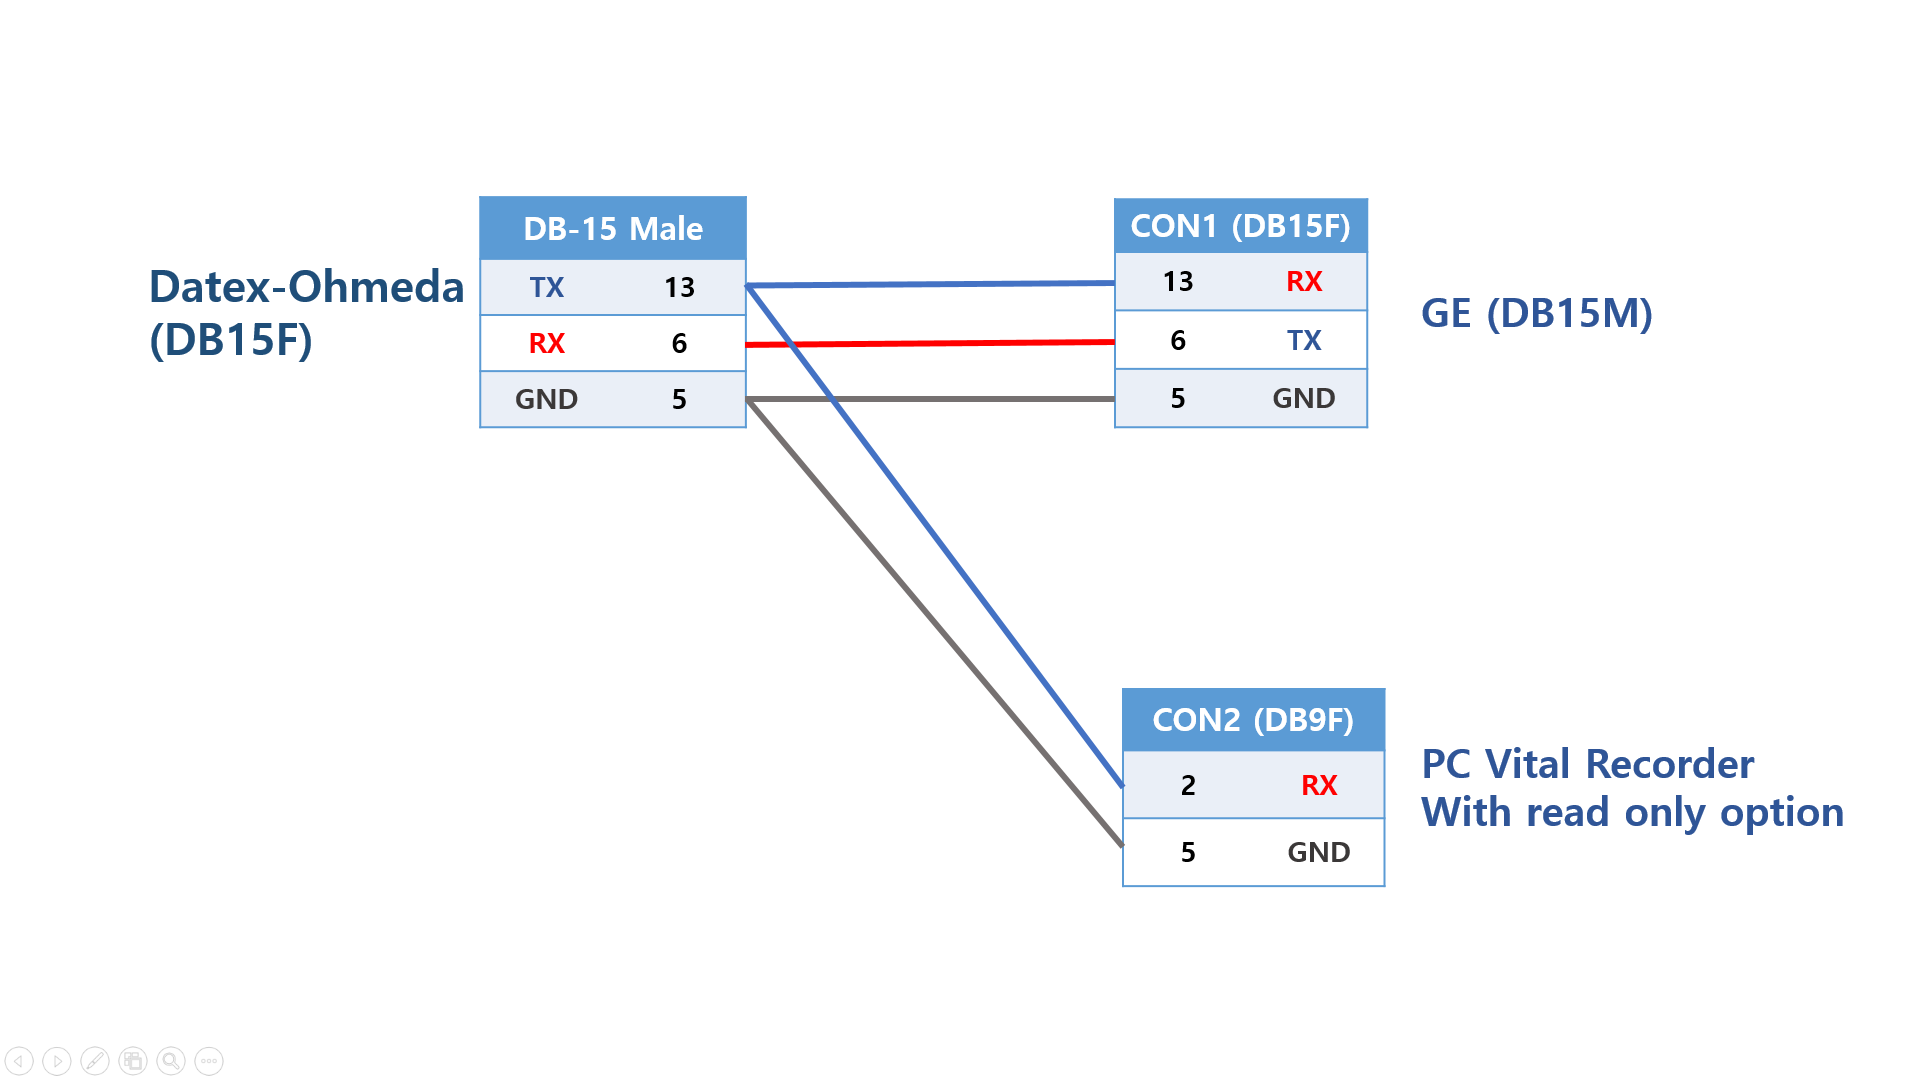
For the connection shown below, use a Y-cable with a receive-only branch to Vital Recorder. Enable Read Only Mode when adding the device.
Y-Cable Pinout
| Machine end — 15-pin D-sub male | Existing connection — 15-pin D-sub female (CON1) | PC end — DB-9F (CON2) |
|---|---|---|
| 13 (TxD from machine) | 13 | 2 (RxD at PC) |
| 6 (RxD to machine) | 6 | Not connected |
| 5 (GND) | 5 | 5 (GND) |
Only the machine's transmit signal and ground connect to the PC branch.
Device Configuration
No changes to the machine settings are required for this setup.
Vital Recorder Setup
Add the device as Datex-Ohmeda and select the PC serial port used for the connection.
For a Y-cable connection, enable Read Only Mode. Available data depends on the existing communication between the machine and the connected device.